
A Season-Ready Plan for a Durable Home Exterior
Key Takeaways
- A lasting exterior finish begins with inspection, repairs, cleaning, and surface preparation.
- Rain, humidity, temperature changes, wind, and direct sun can affect application and drying.
- Exterior colors should complement fixed features, including the roof, masonry, driveway, and landscaping.
- Homes built before 1978 require added caution when old paint is disturbed.
- Regular inspections can catch small paint and moisture problems before they spread.
A fresh exterior can improve a home's appearance, but the more important goal is protecting siding, trim, and other exposed surfaces from the elements. A thoughtful exterior painting plan at https://www.batespainting.com/services/exterior-painting/ starts with the condition of the home, not simply a color swatch. Planning gives homeowners time to identify repairs, choose compatible products, and schedule work during suitable conditions. Whether the project is handled personally or with help from a painting professional, preparation and ongoing maintenance directly affect how finished surfaces look and perform.
Why Exterior Planning Matters
Exterior coatings serve both visual and practical purposes. They provide color and help shield prepared surfaces from sun, rain, and normal seasonal exposure. However, paint is not a repair material. If water is entering around a window, trim is soft, or caulk has separated, a new coat may temporarily cover the problem while the underlying damage continues. For example, a homeowner may be ready to replace faded beige siding with a modern blue-gray, only to find loose caulk and deteriorated window trim during the initial walk-around. Discovering those issues before painting creates a clearer project scope and helps prevent a finish from being applied over unstable material.
Step One: Inspect the Home Before Choosing Paint
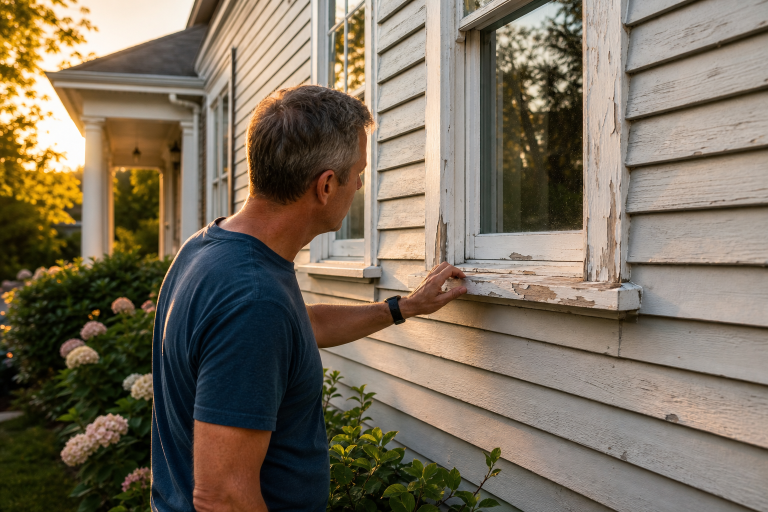
Walk slowly around the property in daylight and look closely at siding, fascia, trim, railings, shutters, doors, and areas near gutters. Make notes and take photos so recurring trouble spots are easier to track.
- Peeling, blistering, cracking, or chalky paint
- Soft, split, or rotting wood
- Loose siding, trim, shutters, or railings
- Cracked caulk around windows, doors, and penetrations
- Mildew, algae, dirt, or cobweb buildup
- Water stains and sections that remain damp after rain
Address the cause of moisture, damaged wood, or failing seals before coating the area. Paint adheres best to sound, clean, dry surfaces.
Step Two: Match Preparation to the Surface
Each exterior material requires preparation suited to its condition and the coating system being used. Product labels and manufacturer instructions should guide decisions on cleaning, priming, drying, and recoating.
Common Surface Considerations
- Wood: Remove loose coating, feather rough edges, repair or replace decayed sections, and prime bare wood as directed.
- Stucco: Inspect cracks, allow patching materials to cure, and select coatings intended for masonry surfaces.
- Brick: Confirm that painting is appropriate for the brick and resolve moisture concerns before applying a coating.
- Vinyl or composite siding: Clean gently and verify that the selected product and color are suitable for the material.
- Metal: Remove rust and loose paint, smooth damaged areas, and use a compatible primer where needed.
Step Three: Clean, Dry, and Repair
- Remove dirt, mildew, loose debris, and cobwebs.
- Allow surfaces to dry completely.
- Scrape and sand only the areas that need it.
- Replace failed caulk and repair weak or damaged materials.
- Prime bare, repaired, or stained areas according to product directions.
- Cover plants, furniture, fixtures, windows, and walkways before work begins.
Preparation can take longer than applying finish coats, especially on an older home. That time is worthwhile because it creates a more uniform surface and reduces the risk of coating loose material, trapped dirt, or unresolved damage.
Step Four: Pick a Color That Works With the Whole Property
Begin with features that are difficult or expensive to change, such as roof shingles, stone, brick, hardscaping, and the driveway. Then use the home's architectural style to guide the palette. Many homeowners find that one main color, one trim color, and a limited number of accent colors create a balanced result. Test samples on both sides of the house. Morning light, afternoon sun, shade, cloudy weather, nearby trees, and surrounding soil can all influence how a color appears. A shade that seems subtle on a small sample card may look darker or more intense across an entire wall.
Step Five: Schedule Around Weather
The forecast matters as much as the calendar. Rain, heavy humidity, wind, cold nights, and hot surfaces can interfere with application or curing. Practical weather timing advice for exterior paint also emphasizes checking both daytime conditions and overnight temperatures.
- Choose a dry period that covers application and early curing.
- Watch for dew, fog, storms, and sudden temperature drops.
- Avoid working on surfaces that are unusually hot from direct sunlight.
- Follow the temperature range, recoat time, and weather guidance printed on the specific product label.
Step Six: Treat Older Homes With Extra Care
Homes built before 1978 may contain lead-based paint. Scraping, sanding, cutting, or otherwise disturbing old coatings can create hazardous dust and debris. Before beginning extensive preparation work, review the lead-safe renovation guidance for DIYers and consider professional testing when the existing coating is uncertain.
- Use containment and careful cleanup practices.
- Avoid methods that spread dust unnecessarily.
- Keep children, pets, and uninvolved people away from the work area.
- Consider trained, properly certified help for substantial paint removal.
How to Compare Paint Products
Compare products based on the surface's needs rather than price alone. Check surface compatibility, moisture and fade resistance, flexibility, mildew resistance where appropriate, primer requirements, coverage estimates, recoat timing, cleanup, and disposal instructions. The right product still depends on correct preparation and application.
Questions to Ask Before Work Begins
- Which repairs are included before painting begins?
- How will damaged wood, loose siding, and failed caulk be handled?
- How will landscaping and outdoor belongings be protected?
- What weather conditions would postpone the work?
- Which primers and finishes are recommended for each material?
- How will paint chips, dust, wash water, and cleanup be managed?
A Simple Maintenance Plan
Walk around the home twice a year and inspect beneath gutters, around windows and doors, and along lower wall sections that receive splashback. Look for peeling paint, cracks, stains, mildew, and open seams. Keep gutters and downspouts clear, touch up minor issues promptly, and note any areas that repeatedly stay wet. Consistent attention helps homeowners respond to small exterior issues before they become larger repair projects.
Final Thoughts
A durable exterior starts well before the first coat goes on. A careful inspection can identify cracks, peeling areas, moisture concerns, damaged wood, and other surface problems that may need attention before painting begins. Repairs, thorough cleaning, compatible materials, appropriate primer, sensible color choices, and suitable weather conditions all contribute to a more dependable result. Proper preparation also helps the new coating adhere to the surface and can reduce the likelihood of premature peeling or uneven coverage. Color should be selected with the home's siding, brick, stone, roof, trim, and surrounding environment in mind rather than based only on current trends. It is also important to follow product requirements for temperature, moisture, and drying conditions during application. Treating exterior painting as part of a broader maintenance plan can help property owners monitor changes, address small problems earlier, and keep a home looking cared for through every season.